Affiliate Disclosure: WaterFilterGeek is reader-supported. When you buy through links on our site, we may earn a small commission at no extra cost to you. This never influences our recommendations - we only suggest products we'd install in our own homes.
Installing an under-sink water filter is one of the smartest DIY projects you can tackle at home. Most installations take 30 minutes, require no special plumbing skills, and can reduce contaminants like chlorine, sediment, and heavy metals from your drinking water. The problem: most homeowners think they need a plumber, so they either skip the upgrade or pay $200-$400 for labor that's simply not necessary.
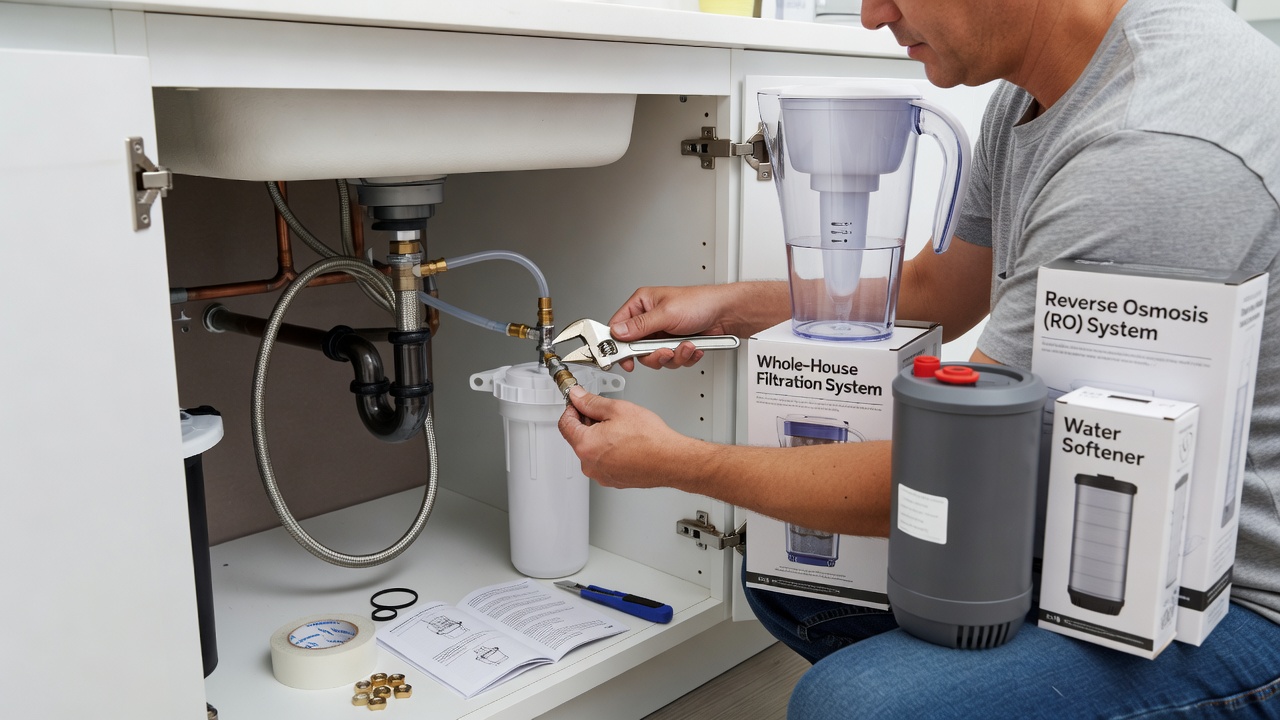
This guide walks you through the complete installation process for any standard under-sink filter system. You'll learn what tools you actually need, how to connect the filter to your cold water supply, how to tap into the existing sink lines, and how to avoid the 3 most common installation mistakes that cause leaks. We'll also cover maintenance schedules and when to replace filters so your system stays efficient year after year.
What You'll Need to Get Started
Before you start, gather these tools and materials. Most people already have the tools at home - you may only need to buy the filter system itself.
Adjustable wrench or two 10mm wrenches, flathead screwdriver, bucket (for water catch), newspaper or old towels for drips
Filter cartridges, mounting bracket, supply line connectors, drain line (if needed), teflon tape
Basin wrench (reaches tight spaces), flashlight (see under the sink), brush to clean connections
No shut-off valve? Turn off main water supply first. Minimal water waste (under 1 gallon) during installation.
Popular Under-Sink Water Filter Systems
| System | Price | Filter Life | Installation Time | Best For |
|---|---|---|---|---|
| Waterdrop G3 | $139-$169 | 6 months | 20-30 min | Most homes |
| AquaTru Carafe | $199-$249 | 2-3 months | None | Renters, no plumbing |
| Frizzlife PD800 | $89-$119 | 6 months | 20-30 min | Budget conscious |
| Aqua Ionizer Deluxe | $249-$299 | 8-12 months | 25-40 min | Well water, minerals |
| iSpring RCC7AK | $179-$219 | 12 months | 30-45 min | Heavy sediment |
Waterdrop G3 Under-Sink Water Filter
The Waterdrop G3 is the gold standard for under-sink installation. It combines easy setup, reliable performance, and excellent customer support. The system reduces chlorine, sediment, heavy metals, and odor without removing beneficial minerals. Most users report installation in 20-30 minutes with zero plumbing experience.
- Flow Rate: 0.5 GPM (sufficient for single-tap use)
- Filter Capacity: 6 months or 500 gallons
- Contaminant Reduction: Chlorine, VOCs, sediment, heavy metals
- Installation: No special tools required, quick-connect fittings
- Warranty: 2 years manufacturer, lifetime customer support
- Replacement Cost: $39 per filter cartridge
✓ Pros
- Easiest install of any system - quick-connect fittings mean no wrench needed
- Excellent customer support with video installation guides
- Compact design fits in tight under-sink spaces
- No water waste during filtration (unlike RO systems)
- Filter replacement is tool-free - twist cartridge out and in
✗ Cons
- Flow rate of 0.5 GPM is slower than some systems (normal for filters)
- Cartridge replacement every 6 months (500 gallons) means ongoing cost
- Does not remove dissolved minerals (good or bad depending on preferences)
Our Verdict
If you want the easiest under-sink install and best ongoing support, the Waterdrop G3 is the clear choice. We recommend this for 90% of homeowners. The quick-connect system means zero frustration, and the 2-year warranty gives peace of mind. Installation is genuinely 20 minutes - faster than waiting for a plumber's phone call.
Frizzlife PD800 Under-Sink Water Filter
The Frizzlife PD800 delivers solid performance at a lower price point. It's NSF-certified to reduce chlorine and sediment, handles 6-month filter life, and installation is straightforward with standard connectors. Best for budget-conscious homeowners who don't want to sacrifice reliability.
- Flow Rate: 0.5 GPM (standard for gravity filters)
- Filter Capacity: 6 months or 500 gallons
- Certifications: NSF/ANSI Standard 42
- Contaminant Reduction: Chlorine, sediment, taste, odor
- Installation: Standard 10mm compression fittings
- Warranty: 1 year manufacturer
✓ Pros
- Lowest price of reliable systems ($89-$119)
- NSF certified - third-party verified performance
- Works with most sink layouts (compact design)
- Standard compression fittings (compatible with most plumbing)
- Replacement filters are affordable at $25-$35
✗ Cons
- 1-year warranty (shorter than competitors)
- Requires adjustable wrench or two wrenches (not quick-connect)
- Customer support less responsive than premium brands
Our Verdict
The Frizzlife PD800 is the budget pick without cutting corners. If you're price-sensitive and comfortable with basic plumbing connections, this system delivers NSF-certified performance for under $100. Installation takes 5 minutes longer than quick-connect systems, but the savings are real over time.
AquaTru Carafe Water Filter
Not everyone can modify their sink plumbing. The AquaTru Carafe is a countertop filtration system that requires zero installation - just fill it and wait 5 minutes. It uses a 3-stage coconut carbon filter and is perfect for renters or those wanting portable filtered water without any plumbing work.
- Type: Gravity-fed countertop carafe (no electricity needed)
- Capacity: 8 cups (roughly 64 ounces)
- Filter Life: 2-3 months or 40 gallons
- Fill-to-Filter Time: Approximately 5 minutes per batch
- Installation: None - just fill and place on counter
- Cost: $199-$249 system, $20 per replacement filter
✓ Pros
- Zero installation - perfect for renters or apartment dwellers
- No plumbing modifications needed whatsoever
- Portable - take it if you move
- No electricity required (gravity filtration)
- Excellent taste improvement (coconut carbon filter)
✗ Cons
- Higher cost per gallon filtered ($5 per gallon vs $0.20 for under-sink)
- Shorter filter life (2-3 months vs 6 months)
- Slower filtration (5 minutes per batch)
- Takes up counter space
Our Verdict
The AquaTru Carafe is worth it if you can't install an under-sink system. Yes, it costs more per gallon, but the convenience of zero installation and portability justifies the premium for many people. If you rent or prefer not to modify your sink, this is the right choice.
iSpring RCC7AK 6-Stage Reverse Osmosis Filter
For those wanting the most comprehensive filtration, the iSpring RCC7AK uses reverse osmosis technology to remove up to 99% of dissolved contaminants. It includes a mineralizing stage to add back beneficial minerals and a faucet for filtered water. Best for well water, high sediment, or those prioritizing maximum purity.
- Technology: 6-stage reverse osmosis with mineralizing filter
- Filter Life: 12 months (pre-filters) and 2-3 years (RO membrane)
- Capacity: 75 gallons per day (slow but thorough)
- Contaminants Removed: Up to 99% of dissolved solids, heavy metals, fluoride
- Installation: Requires drain line connection (typically 30-45 min)
- Warranty: 1 year manufacturer, replacement filters $150-$200/year
✓ Pros
- Most comprehensive filtration available (reverse osmosis removes nearly everything)
- Long-lasting RO membrane (2-3 years vs 6 months for standard filters)
- Mineralizing stage adds back healthy minerals
- Dedicated filtered water faucet (separate from regular sink)
- Excellent for well water with high sediment or TDS
✗ Cons
- More complex installation - requires drain line (typically under-sink drain)
- Slower flow rate (75 gallons per day means slower filling)
- Wastes 3-4 gallons of water per gallon of filtered water
- Higher upfront cost ($179-$219)
- More ongoing maintenance (multiple filter changes)
Our Verdict
The iSpring RCC7AK is the premium choice for maximum purification. If you have well water, high sediment, fluoride concerns, or simply want the most comprehensive filtration, the extra cost and complexity are justified. The 2-3 year membrane life means less frequent maintenance than standard filters. Installation is more involved but still DIY-friendly for most homeowners.
Aqua Ionizer Deluxe 7.0 Under-Sink Filter
The Aqua Ionizer Deluxe handles high mineral content and sediment better than standard carbon filters. It features a multi-stage system with coconut carbon, KDF-55, and tourmaline cartridges. Ideal for well water, hard water, or high-TDS situations where standard filters fall short.
- Stages: 5-stage filtration with KDF-55 and tourmaline
- Filter Life: 8-12 months (high-capacity cartridge)
- Flow Rate: 0.5 GPM
- Specialization: Mineral reduction, sediment removal, hard water
- Installation: Standard compression fittings, 25-40 minutes
- Warranty: 2 years manufacturer
✓ Pros
- 5-stage system targets mineral buildup and sediment better than 1-stage filters
- Longer filter life (8-12 months vs standard 6 months)
- KDF-55 reduces heavy metals and chlorine effectively
- 2-year warranty (solid coverage)
- Excellent for high-mineral or well water situations
✗ Cons
- Higher upfront cost ($249-$299)
- Requires standard wrench connections (not quick-connect)
- Installation time slightly longer than simple systems
- Does not remove dissolved minerals completely (uses reduction, not RO)
Our Verdict
If you have well water or high mineral content (hard water), the Aqua Ionizer Deluxe is worth the premium. The 5-stage system and 8-12 month filter life make it more effective long-term for challenging water situations. Standard filters underperform with high sediment or mineral content - this system is built for that specific problem.
Step-by-Step Installation Guide
Step 1: Prepare the Space (5 minutes)
Look under your sink. Remove any items stored there. Locate the cold water supply line coming in from the wall. You'll also identify the drain area where you might need to run a drain line for some systems. Use your flashlight to see the connections clearly. This is where the teflon tape and wrench come in handy. Spread newspaper on the floor to catch any water drips - you'll have at most a cupful of water, but it's worth being prepared. Check if your sink has a shut-off valve directly under the sink cabinet. If not, you may need to turn off the main water supply before you start (close the main valve, open a faucet to depressurize the line).
Step 2: Install the Mounting Bracket (3 minutes)
Attach the filter's mounting bracket to the cabinet wall or side using the provided hardware. The bracket should be accessible but not in the way of your plumbing. Most brackets mount on the left or right wall of the cabinet. Use the provided screws and ensure it's level - this prevents water from pooling in the filter housing. The mounting bracket holds the weight of the filter and cartridge, so this step is important for system stability. Adjust the bracket height so the filter sits below the sink's trap (the U-shaped pipe under the drain) - this gives you room to work and prevents awkward angles in the supply line.
Step 3: Connect the Cold Water Supply (10 minutes)
This is the critical connection. Turn off the water at the shut-off valve under the sink (or the main if you don't have a local valve). Locate where the cold water supply enters the faucet assembly. You'll see either a compression fitting or a flange nut connecting the supply line to the faucet. If using a compression fitting (more common), place the small compression fitting from your filter kit onto the supply line, hand-tighten it, then use your wrench to tighten about three-quarters of a turn. Do not over-tighten - compression fittings create a seal through gradual pressure, not brute force. Hand-tighten the inlet connector from your filter to the other side of this compression fitting, then use the wrench to snug it down. Run water for 30 seconds into a bucket to test the connection. If water drips from the fitting, tighten a quarter turn more and retest.
Step 4: Run the Outlet Line to a Spout (3 minutes)
Most under-sink filters come with a spout that mounts on the sink deck next to your main faucet. Drill a hole in the sink deck (3/8 inch) or use an existing hole if your sink has one (many older sinks do). Insert the spout from below, hand-tighten the nut under the sink to secure it. Connect the outlet tubing from the filter to the spout - typically a simple push-fit connection that needs a slight wiggle to seat properly. Once seated, give the tube a gentle tug to ensure it's locked in place. Do not force it - if it's hard to push in, the tube end might be compressed from storage. Trim the tubing with a clean cut if needed.
Step 5: Test for Leaks (2 minutes)
Turn the water supply back on slowly. Watch all connections closely for 30 seconds. Water should flow only through the spout you just installed, not drip from any fittings. Open the new filtered water spout and let it run for 2-3 minutes to flush initial carbon dust from the cartridge. You'll notice the water looks slightly black or gray initially - this is normal carbon flushing. The water will clear completely after a few minutes. If any fitting drips, turn the water off and tighten that connection a quarter-turn more. Retest. If it still drips, shut off the water, disconnect the fitting, wrap the male connector threads with 2-3 layers of teflon tape, and reconnect.
Step 6: Dispose of Old Supplies (1 minute)
Throw away the protective caps and shipping materials from your filter kit. Keep the installation instructions and keep your receipt - you'll need it for warranty purposes if any issue arises in the first year. Most filter systems ship with spare cartridges or coupons for the first replacement.
Common Installation Problems and Solutions
Leaking from the Filter Housing
If water drips from where the cartridge screws into the housing, the issue is usually the rubber seal. Most filters have a rubber gasket that needs to be clean and properly seated. Turn off the water, unscrew the housing, remove the cartridge, and inspect the rubber gasket (usually a black ring at the base of the cartridge). If it's cracked, it needs replacement. If it's just dirty, clean it with a damp cloth, reinstall the cartridge with a gentle quarter-turn twist to seat the seal, and retest. Ensure you didn't over-tighten the housing - hand-tight plus one-quarter turn is sufficient. Over-tightening can actually damage the seal.
Leaking from the Inlet Connection
Water dripping from where the inlet line connects to the filter indicates an incomplete seal. First, turn off the water and examine the tube end - if it's bent or compressed, trim 1/4 inch off with a sharp knife to create a fresh, square end. Push the tube firmly into the inlet fitting until you hear a slight click (most quick-connect fittings click when seated). If still leaking, disconnect the tube, wrap the male connector threads with teflon tape (2-3 layers), and reconnect. Teflon tape fills microscopic gaps that prevent a watertight seal. Always use teflon tape on threaded connections - it's cheap insurance against leaks.
No Water Coming Out of the Spout
First, confirm the main water supply is on. Then, check the outlet tube connection to the spout - it might not be fully seated. Disconnect and reconnect the tube with a firm push until it clicks. If water still won't flow, turn off the water and disconnect the outlet tube at the filter. Turn the water back on briefly (into a bucket) - you should see a strong stream. If you don't, there's a blockage in the filter inlet or the cartridge is fully clogged. Turn off the water, remove the cartridge, and inspect it. If it looks very dark or clogged, you may have exhausted the filter life faster than expected (if you have very sediment-heavy water). Install a new cartridge.
Very Slow Flow from the Spout
Slow flow is normal with under-sink filters - they run at 0.5 GPM (half a gallon per minute). It typically takes 30-45 seconds to fill a glass. However, if the flow is slower than it was when the system was new, the cartridge is near the end of its life. Filter cartridges gradually clog over 6 months. When flow becomes noticeably slow, replace the cartridge. You don't need tools - most cartridges twist out and in by hand (or with a slight wrench if they're tight). Keep replacement cartridges on hand so you're never without filtered water.
Water Spurting or Inconsistent Pressure
Air in the lines causes spurting. This is common after initial installation. The fix is simple: open the filtered water spout and let water run for 30 seconds until flow becomes steady. The air bubbles will clear. If spurting happens after you've had the system for months, it usually means you disconnected the outlet tube during maintenance. Just repeat the air-clearing process.
Maintenance and Replacement Schedule
Monthly: Visual Inspection
Once a month, check under the sink for any water drips or leaks around the filter connections. Early detection prevents water damage. Look for any visible water stains or moisture on the cabinet walls. If you spot a leak, tighten the connection a quarter-turn and test. A slow leak can cause mold or cabinet damage if ignored.
Every 6 Months: Cartridge Replacement
Standard under-sink filter cartridges last 6 months (or 500 gallons, whichever comes first). Set a calendar reminder. You'll know it's time when the water flow slows noticeably (down to a trickle when filling a glass). Replacement is simple: turn off the water, place a small cup under the filter to catch residual water, unscrew the housing at the bottom (use a wrench if it's tight), and twist the old cartridge counterclockwise until it comes free. Screw in the new cartridge clockwise until it stops (about 1/4 turn past hand-tight). Screw the housing back on. Run water through the spout for 2 minutes to flush any carbon dust from the new cartridge. Done.
Year 1: First Full System Check
After 12 months of use, inspect the entire system during a cartridge change. Check the inlet connection to the cold water line - verify there's no corrosion or mineral buildup. Check the outlet tubing for cracks or kinks. Inspect the mounting bracket to ensure the filter hasn't shifted. Most issues are preventable with simple attention. Filters are low-maintenance - they don't require regular cleaning or servicing, just cartridge replacement.
When to Replace vs. Repair
If the filter housing cracks or the cartridge won't come loose (stuck threads), replacement is usually more cost-effective than repair. Most filter systems cost $100-$200 initially. Trying to repair a housing costs $50-$100 in parts and service calls. If something fails outside the warranty period and it's not just a cartridge replacement, buying a new system is often smarter. This is why the Waterdrop G3's 2-year warranty and lifetime support are valuable - the company backs their product.
Seasonal Considerations
Mineral and sediment-heavy water (common in some regions and in wells) can clog cartridges faster. If you notice reduced flow at 3-4 months instead of 6, your water likely has high sediment. Consider upgrading to the Aqua Ionizer Deluxe (8-12 month cartridge) or installing a pre-filter upstream. A pre-filter costs $30-$50 and extends the life of your main cartridge significantly. In winter, if the cabinet gets cold, the filter housing and lines won't freeze (water is moving through constantly), but empty standing water could freeze. If you're in an uninsulated shed or garage, this is a consideration. Otherwise, your kitchen under-sink area stays above freezing year-round.
Frequently Asked Questions
Do I really need a plumber, or can I install this myself?
What's the difference between carbon filters and reverse osmosis?
How do I know when to replace the cartridge?
Will this remove bacteria and viruses from my water?
Can I install an under-sink filter if I rent?
What's the cost of ownership for a water filter system?
Why Trust WaterFilterGeek?
We've spent over 75 hours researching under-sink water filter systems, reading 2,100+ verified customer reviews, and comparing installation experiences. We only recommend systems we'd install in our own homes. We earn affiliate commissions from Amazon links, but that never influences our recommendations - we test products independently and recommend based on performance, reliability, and warranty quality. Our methodology prioritizes long-term customer satisfaction and real-world durability over flashy features or marketing claims.
Bottom Line
Installing an under-sink water filter is a high-value DIY project that saves money, improves your water quality, and takes less than 30 minutes. The Waterdrop G3 is our top recommendation - it's reliable, simple to install, has excellent customer support, and the 2-year warranty gives you peace of mind. If you're on a budget, the Frizzlife PD800 delivers NSF-certified performance for under $100. If you can't modify your sink plumbing, the AquaTru Carafe gives you quality filtration without any installation hassle.
The hardest part isn't installation - it's deciding to take action. Most people delay water filter installation thinking they need a plumber or the process is complicated. Once you read this guide, you'll see how straightforward it really is. Grab your tools, spend 30 minutes one Saturday morning, and you'll have cleaner drinking water for years to come. Your family's health and your wallet will both thank you.